On this page
Avalanches are the biggest danger in the mountains outside the marked runs. The good news: on open, marked pistes, the resort manages avalanche risk for you. The moment you leave them, that responsibility is yours.
Why beginners must stay on the piste
- Off-piste terrain is not controlled, patrolled or secured against avalanches.
- Even a few metres beside the piste can be dangerous on steep slopes.
- Rescue depends on having the right equipment and training — and your companions knowing how to use it.
- Most avalanche victims trigger the slide themselves or someone in their group does.
- Off-piste terrain also hides cliffs, rocks, tree wells and crevasses on glaciers.
Avalanche danger levels
In Europe and North America, avalanche danger is published daily on a 5-level scale. You’ll see it on flags and boards at lift stations.
| Level | Name | What it means |
|---|---|---|
| 1 | Low | Generally stable; avalanches possible on isolated extreme slopes |
| 2 | Moderate | Mostly stable, but triggering possible on some steep slopes |
| 3 | Considerable | Human-triggered avalanches likely on many steep slopes — the level where most fatal accidents occur |
| 4 | High | Triggering likely on many steep slopes; natural avalanches expected |
| 5 | Very high | Extraordinary situation; large natural avalanches |
“Only 3” doesn’t mean “medium risk”. Level 3 (Considerable) is responsible for a large share of avalanche fatalities because conditions look inviting while being dangerous.
Basic avalanche concepts
- Slope angle: most slab avalanches release on slopes of 30–45°. A red run is often around 25–30° at its steepest.
- Fresh snow and wind: heavy snowfall and wind-drifted snow create unstable slabs.
- Warming: rapid temperature rise and afternoon sun loosen snow, especially in spring.
- Weak layers buried in the snowpack can persist for weeks.
- Warning signs: recent avalanches, “whumpf” sounds, shooting cracks.
The essential avalanche kit
| Item | What it does |
|---|---|
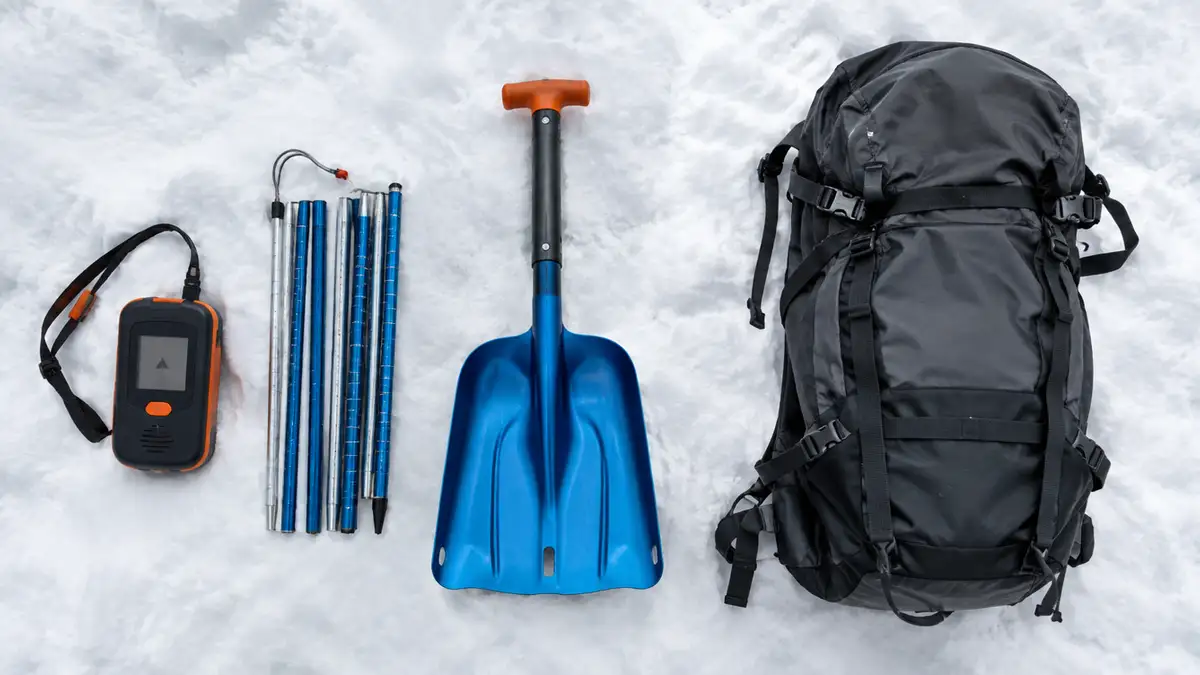
| Transceiver (beacon) | Worn on your body, switched to “send”. If someone is buried, companions switch to “search” to locate their signal. |
| Probe | A folding pole to pinpoint the buried person’s exact location and depth. |
| Shovel | A metal shovel to dig them out quickly — snow sets like concrete. |
| Airbag backpack | Inflates to help keep you near the surface. Doesn’t replace the other three. |
These tools are useless without practice. Survival chances drop sharply after about 15 minutes of burial, so companion rescue is critical — there’s no time to wait for professional rescue.
Going further: courses and guides
- Take a recognised avalanche awareness course (1–3 days), offered by mountain guide associations, alpine clubs and ski schools.
- Practise with your beacon regularly — many resorts have beacon training parks.
- Always go off-piste with a certified mountain guide until you have the training and experience.
- Check the regional avalanche bulletin every day.
- Never go alone, and never follow tracks blindly.
Safe alternatives to enjoy powder
Ski fresh snow at the edges of open pistes right after snowfall, try marked but ungroomed “freeride” runs (check local rules), or book a guided powder day. Interested in going uphill? Read ski touring for beginners.